In this article we will be explaining the steps to mount your Android Phone as a Local Disk in Windows using an application called AndroidDrive.
AndroidDrive is a free desktop application for Windows that enables you to mount your Android Smartphone as a Drive in Windows explorer. When you launch it and connect your mobile device, AndroidDrive will automatically mount a drive that represents the internal storage of your device.
Working:
1. Before you can use AndroidDrive, you install Dokan on your system which is a user mode file system library for Windows. Click here to download the setup file (DokanSetup.exe) and install the application on your computer.
2. Next, click on this link, to download the setup program of AndroidDrive and install it in your system.
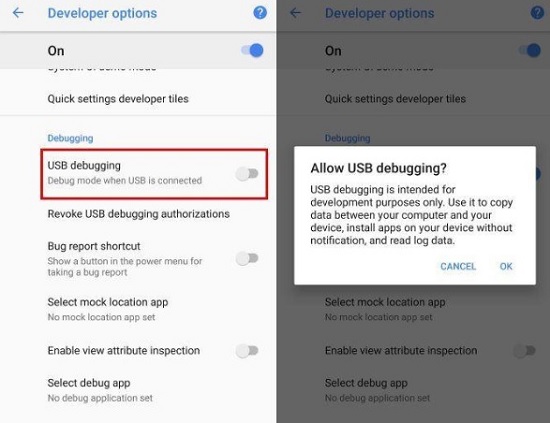
3. You must now enable USB debugging on the Android Device that you wish to connect to your computer. For this, open ‘Settings’ on your device, navigate to ‘About phone’ and scroll down to the bottom.
4. Tap the ‘Build Number’ seven times till you get a message that notifies you saying that you are a developer. Now, navigate to the Settings screen and then go to System from there go to Advanced, from here choose Developer Settings and enable USB debugging by enabling the corresponding check box.
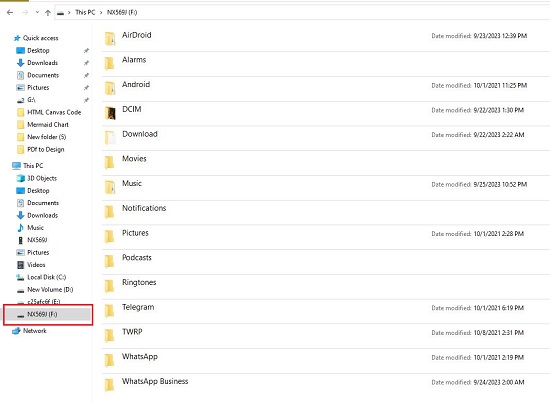
5. You can go ahead and connect your Android Device with the computer and the application will automatically mount its internal storage after assigning the first available drive letter to it.
6. You can now access all the contents of the internal storage of your Android device using your explorer.
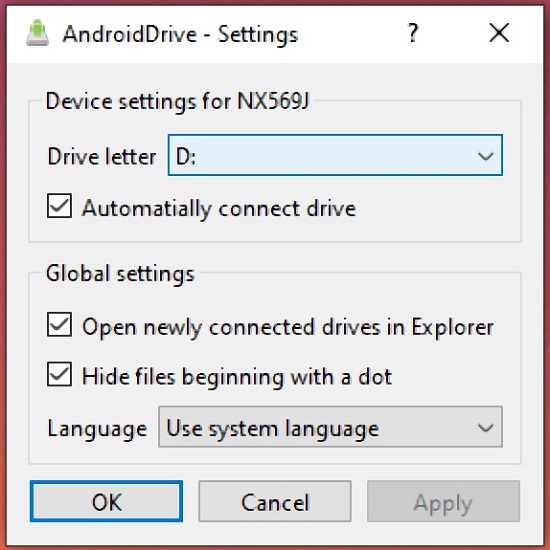
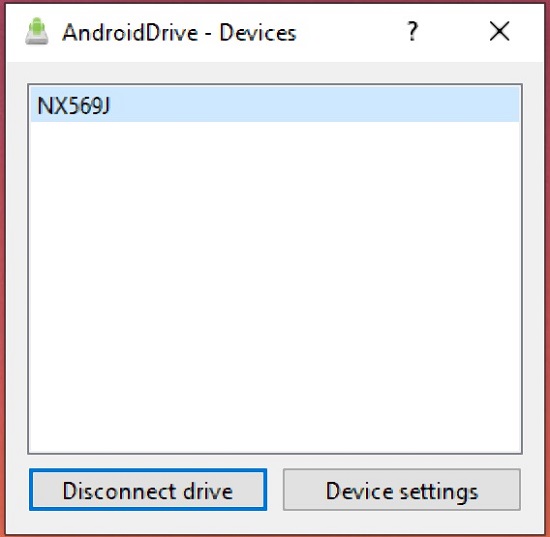
7. If you do not want the application to automatically mount a drive for a specific Android device, right click on the AndroidDrive icon in the task bar, choose ‘Devices’, click on ‘Device Settings’ and disable the ‘Automatically connect drive’ checkbox.
8. If you want to disconnect a mounted drive, right click on the AndroidDrive icon in the task bar, choose ‘Devices’, select the drive that you wish to disconnect and click on the ‘Disconnect drive’ button at the bottom.
9. You can also change the drive letter that has been automatically assigned to your device by AndroidDrive. Go to the ‘Device Settings’ window as earlier and use the drop-down list under ‘Drive Letter’ to choose a suitable one for yourself.
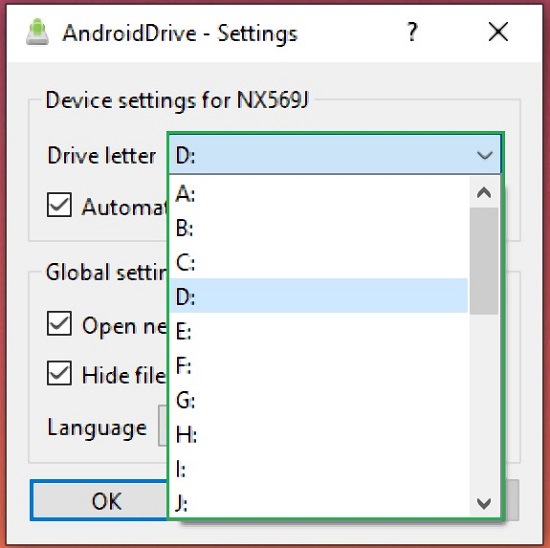
10. If you choose to change the drive letter for a drive that has already been connected, you must disconnect and reconnect for the new drive letter to take effect.
Closing Comments:
AndroidDrive is a simple application that allows you to mount your Android Devices as a drive in Windows explorer and access their internal storage. You can thus easily transfer files between your computer and Android device.
Click here to download AndroidDrive for Windows. To download Dokan, click here.