Has this ever happened to you – you suddenly can’t find your laptop or had it stolen and now you’re panicking? Well, thankfully Microsoft has added a new “Find My Device” feature in Windows 11 for this exact scenario. There is a chance that this “Find My Device” feature is tuned off by default but you can enable it as an extra safety measure and I will show you how.
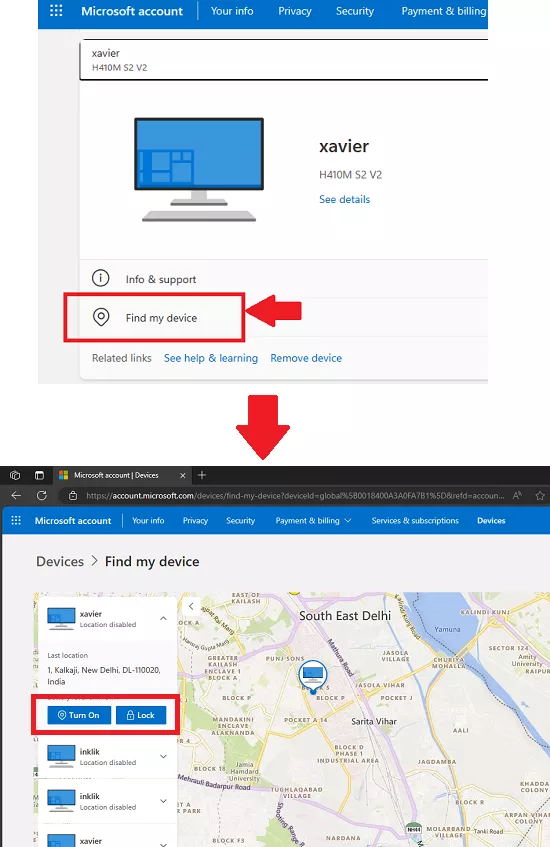
If the worst happens and you can’t find your laptop or Notebook then you can just log into your Microsoft account from anywhere and see the last device location. The Microsoft account website will help you trace your laptop. or it will at least give you a starting point. This feature works in pretty much the same way as Android and macOS.
How to Enable Find My Device feature of Windows 11?
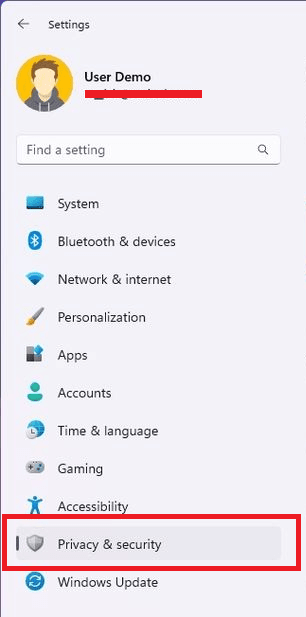
On the latest Windows 11, you can just open the Settings app and then go to the “Privacy and security” page.
Now, on this page, you can simply click on Find My Device option.
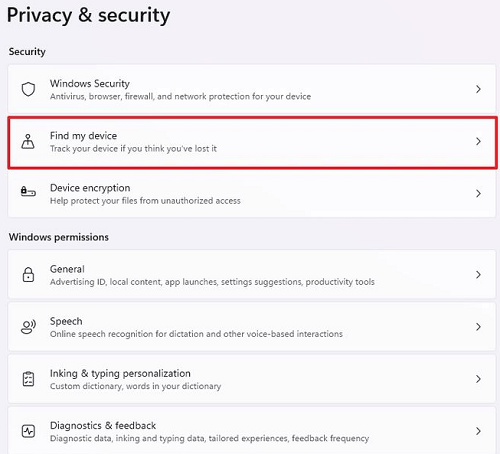
Turn on the find my device and then save the changes. Just exit the Settings app and it will keep updating the location of your device in your Microsoft account.

To see the last location of your laptop or notebook, simply log into your Microsoft account and then go to the Find My Device page. From here it will show the device location on the map.
This is all it takes to enable the find my device feature of Windows 11. This is a good anti-theft system built-in to Windows and you should keep it turned on.
Closing thoughts:
Overall, Find My Device gives major peace of mind knowing a simple setting can offer protection for your expensive devices. So, give “Find My Device” a try the next time you’re setting up your new Windows 11 laptop.