Permissions Time Machine Lite is a free software to easily take access permissions of a file or folder. You must have faced a problem when you to try to delete/rename/modify a folder/file available in Windows installation drive (usually it’s C drive) and you get the error message that “access is denied” or “you require permission from TrustedInstaller to make changes to this folder“. Manually changing the file/folder permissions require a lot of steps and not so easy for amateurs. Therefore, this Permissions Time Machine Lite software comes in handy.
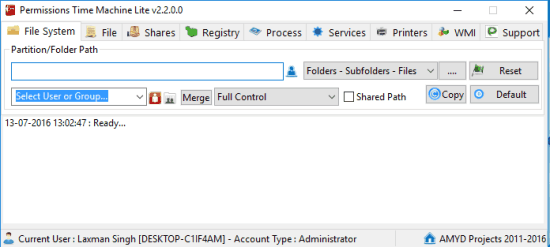
The software provides a user-friendly interface. You need to add a folder/file, select user and groups, set permissions rights (full control, write, delete, etc.), and tap Reset button. That’s it! In a blink of eye, new permissions will be applied, so that you can take actions for the added folder or file. It also works to take or restore access permissions for running processes, services, Registry keys and sub keys, etc. Steps are same for all these items.

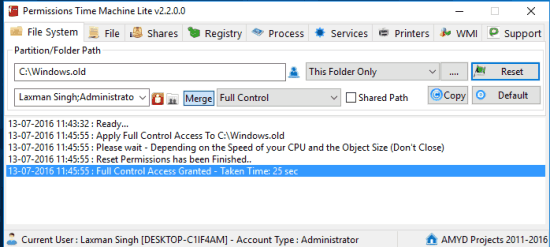
This software helped me to completely remove Windows.old folder from my Windows 10 PC. Although Disk Cleanup tool can remove Windows.old folder, but not when user permissions are set to the TrustedInstaller or other user. So, I first changed the permission types of Windows.old folder using this software, and then I was able to get rid of that folder. This is just an example how useful this tool is. You can try it for any other stubborn file or folder.
Also have a look at these 5 Free USB protection Software To Protect PC From Infected USB Drive.
How To Take or Restore Access Permissions for A Folder or File using This Software?
Step 1: This is a basic step. Download this software and install it. This link will help you grab this software.
Step 2: Open its interface. You might find it very complicated but it ain’t so. Its interface has different tabs to help you easily take or restore permissions for a file, folder, Registry key, process, etc. Since the steps are same for all items, I am gonna cover steps for a folder.

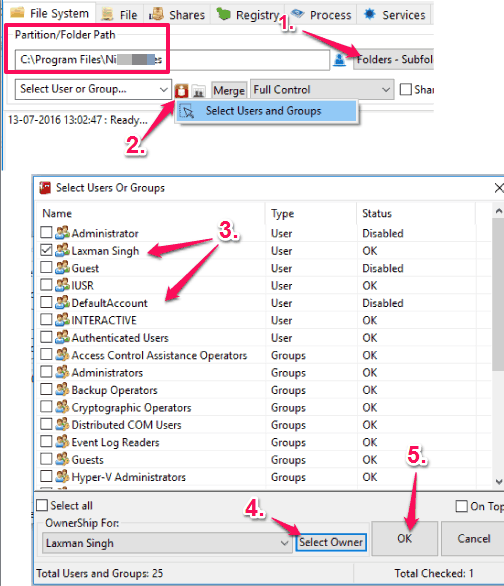
Step 3: On File System tab, insert a folder using Browse icon. Next you have to select Users or Groups for the selected folder. Use the associated icon and a new window will open. Using that window, you can select the user(s) for which you want to take the ownership. See the screenshot below:

Press the OK button and you will come back to the main interface.
Step 4: Now you need to select a few options based on which you can start the processing. For example:
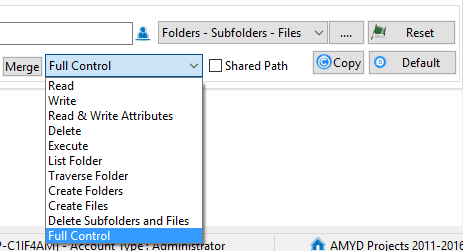
- You need to set the type of permission (Full, Write, Read, Execute, etc.).
- You want to disable or enable Merge option? Enabling the Merge option will not delete current permissions. So you should keep it disabled.
- You have to select whether you want to apply permissions for selected folder, its subfolders and files, only subfolders, etc.

Set the options as per your need. Finally, you can tap on Reset button and it will apply new permissions for the selected folder.
Repeat the same steps for applying new permissions for a file, Registry key, etc.
The Verdict:
Manually changing the file/folder permissions is not a big deal for advanced users, but normal users might have to struggle. Therefore, Permissions Time Machine Lite can be used as an easier solution to take file/folder ownership.